How to easily generate word documents (.docx) in javascript using Docxtemplater
Learn how to generate word documents in javascript by building a simple resume generator
In my latest project, I learnt how to generate a word document from a template using a javascript package called Docxtemplater. It's easier to use and setup compared to the docx package, plus once setup, your clients can edit the templates to their desired style without having to touch the software's code
In this article, i will show you how to use Docxtemplater to generate a simple resume document from a word template. But first...
PermalinkWhat is Docxtemplater?
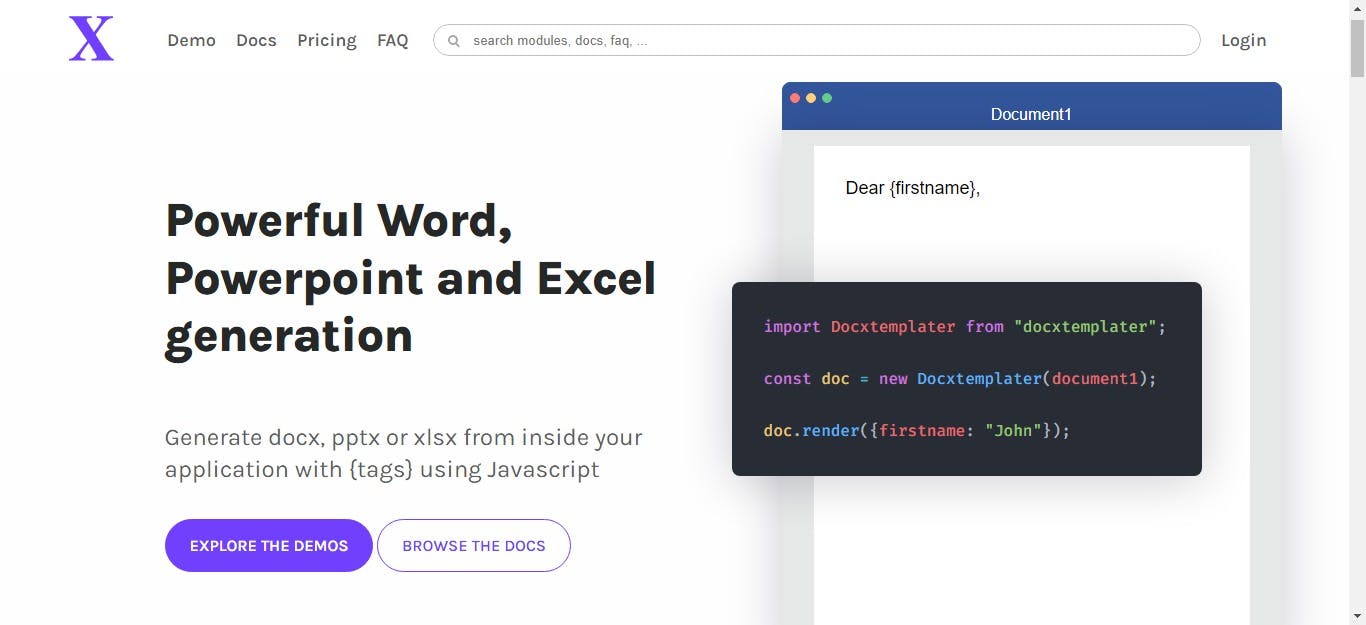 Docxtemplater is an open sourced javascript package that can generate MS Office documents (.docx, .ppt, .xlsx files) from a preexisting template.
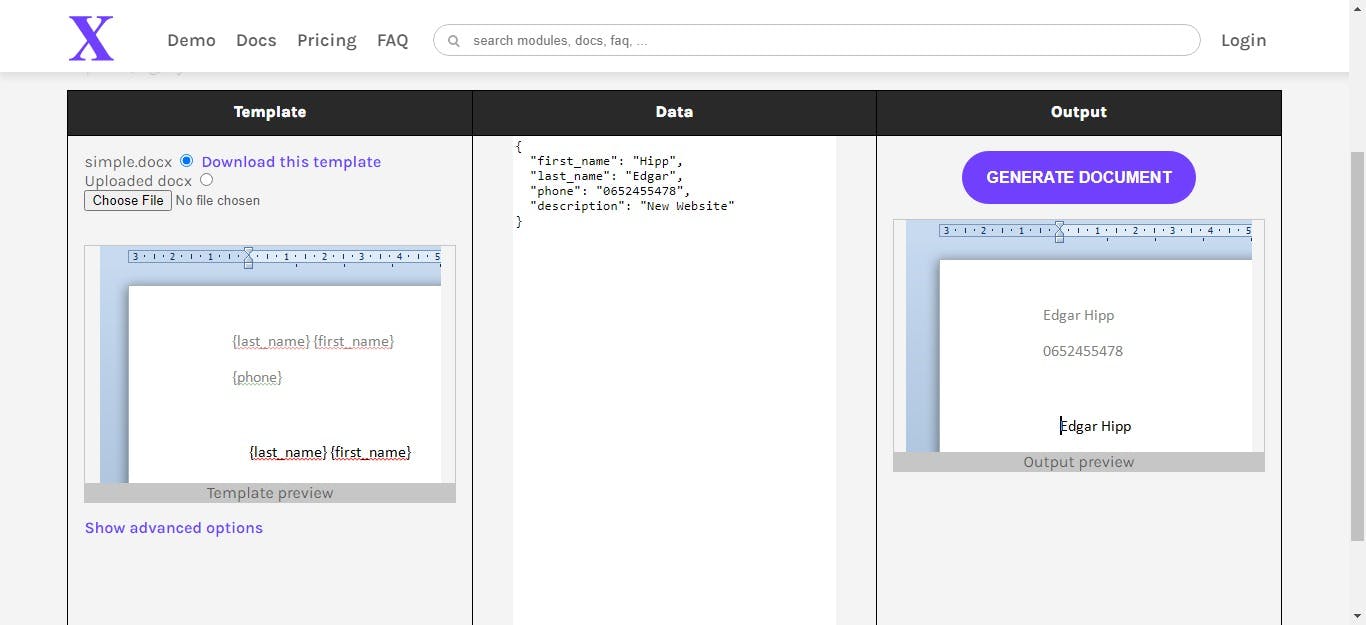
The package can create a new document out of a word template which contain tags (like {}) that can be replaced with data in javascript. That means if my document contains {first_name}, it resolves the value of first_name and replaces the tag with that value
Like in their demo below
This package abstracts above the other popular method of generating word documents which is the docx package, but it is harder to create and maintain documents as you will be building the needed document programmatically.
And that's where Docxtemplater shines
It goes through a word template and makes a copy out of it while filling it with data. That way you can for instance generate an entire employee database as documents by using a template without creating them manually
Alright, let's build our project
PermalinkSetup
We'll kick off by cloning a starter repo i created for you to get up and running quickly. Clone the repo here
You will also need to download and install nodejs if you haven't already. Download it here
After downloading the starter repo locally, let's install the dependencies needed to build our application. Enter this command into the terminal
npm install
Once your dependencies has installed completely, fire up the server with this command
npm run dev
Your browser should open on localhost:8080
PermalinkThe template we will be using
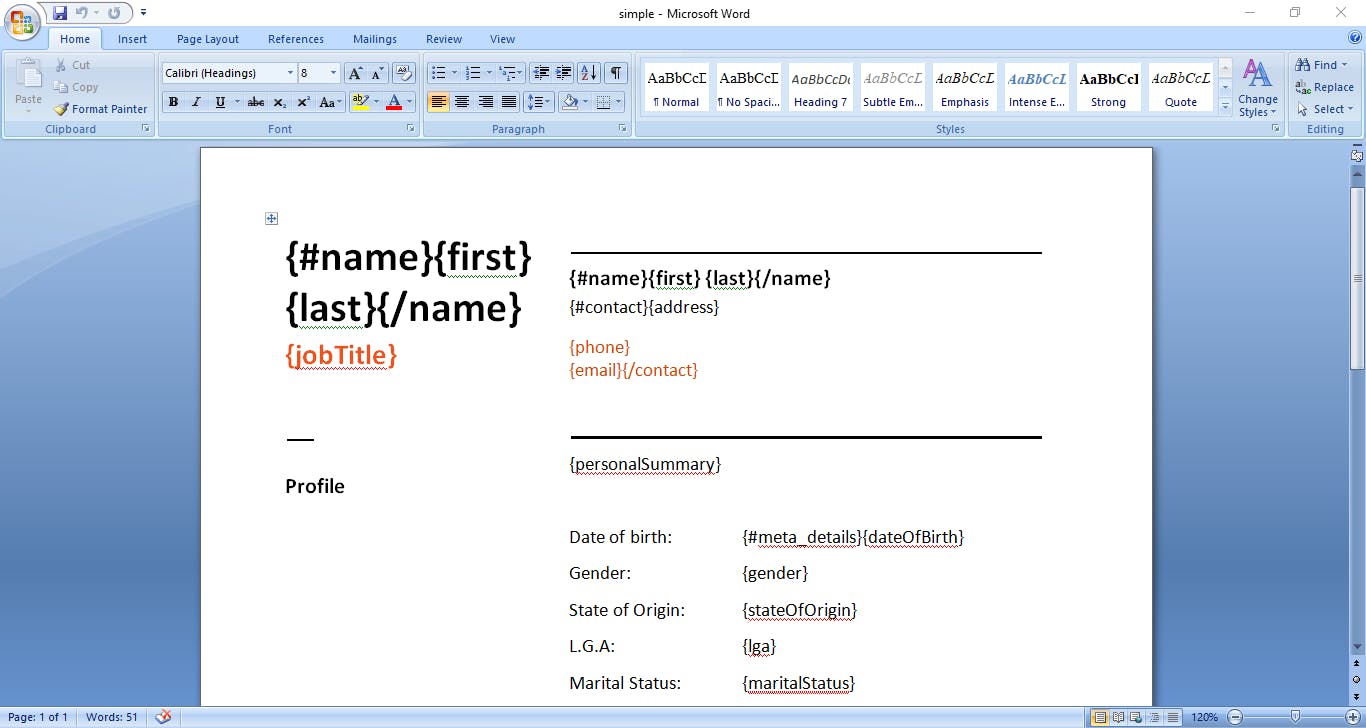
I've provided a word template in the starter repo we will use for this project. Here's what the template looks like (Notice the tags? Docxtemplater replaces those with data)
PermalinkDesigning the trigger
Since this is a simple tutorial, i will limit our interface to a simple button that triggers the document generation process.
In the src/index.html file, let's create a button that will generate our document when clicked
<!-- src/index.html -->
<body>
    <button>Generate Resume</button>
</body>
Make the button pretty by styling it in src/index.css
/* src/index.css */
body {
    margin: 0;
    padding: 0;
    height: 100vh;
    display: flex;
    align-items: center;
    justify-content: center;
}
button {
    padding: 8px 12px;
    background-color: rgb(0, 102, 255);
    border: none;
    border-radius: 5px;
    color: white;
    font-size: 16px;
}
button:hover {
    background-color: rgb(0, 80, 199);
    cursor: pointer;
}
PermalinkBuilding the document generating algorithm
Now that we have our interface down, let's build the core part of the application. I've broken this section into 4 steps so you can follow along:
PermalinkStep 1: Import the neccessary packages we need
In src/index.js, import:
Docxtemplaterfor document generationPizzipto create a zip file from our templatesaveAsfunction fromfile-saverto prompt the user to save the generated document- Our template's path as
templatefromsrc/simple.docx
If you're wondering how we can import a docx file into a js application here's the gist. I setup webpack in the starter repo which is a bundling tool for frontend development. Webpack processes the template
simple.docxand resolves its path totemplate
// in src/index.js
import Docxtemplater from 'docxtemplater';
import PizZip from 'pizzip';
import { saveAs } from 'file-saver';
import template from './simple.docx';
PermalinkStep 2: Define the resume data
Now let's define our resume data as an object. This will be the data that will be used to generate our document from the template.
You can even change the values of the keys in the object, just don't change the keys themselves
// in src/index.js
let resume = {
    name: {
        first: 'John',
        last: 'Doe'
    },
    personalSummary: "Hi i'm John, a software engineer passionate about building well...software",
    jobTitle: 'Software Engineer',
    contact: {
        address: "Lagos, Nigeria",
        phone: '08123456789',
        email: 'johndoe@gmail.com'
    },
    meta_details: {
        dateOfBirth: '24th June, 1995',
        stateOfOrigin: 'Enugu',
        lga: 'Oji-River',
        gender: 'Male',
        maritalStatus: 'Single',
        religion: 'Christian'
    },
    workExperience: [
        {
            nameOfOrg: 'Acme Inc.',
            position: 'Software Developer',
            from: 'July, 2022',
            to: 'Present'
        }
    ],
    education: [
        {
            name: 'Creation Academy',
            location: 'Earth',
            type: 'Primary',
            qualificationObtained: 'Elementary School Certificate',
            started: '18th Feb, 2017',
            finished: '6th July, 2022'
        }
    ],
    referees: [
        {
            name: "Big man",
            nameOfOrg: 'Big man Inc',
            position: 'Big man position',
            contact: 'bigman@verybig.com'
        }
    ]
}
PermalinkStep 3: Call the generating function when the trigger is clicked
Let's add a click event listener to our button that calls a generating function we will define soon. We'll pass the resume object and template to generateDocument()
// in src/index.js
let trigger = document.querySelector('button');
trigger.addEventListener('click', (e) => {
    e.preventDefault();

    return generateDocument(resume, template);
});
PermalinkStep 4: Define the generating function
First off, let's define a function generateDocument() that takes 2 arguments; a resume object and templatePath which is the path to our template file.
In that function, load the template as an arrayBuffer using fetch() and create a zip file from it using Pizzip
The function is asynchronous so we need to use async...await to define the function
// in src/index.js
async function generateDocument(resume, templatePath) {
    try {
        let response = await fetch(templatePath);
        let data = await response.arrayBuffer();
        let zip = PizZip(data);
    } catch (error) {
    console.log('Error: ' + error);
    }
}
Now let's create a Docxtemplater instance with the zip file and pass our resume object to it's render() method
// inside the try-catch block
let templateDoc = new Docxtemplater(zip, {
    paragraphLoop: true,
    linebreaks: true
})

templateDoc.render(resume);
Finally generate our word document filled up with the resume object and prompt the user to save the document with a unique name using saveAs
// inside the try-catch block
let generatedDoc = templateDoc.getZip().generate({
    type: "blob",
    mimeType: "application/vnd.openxmlformats-officedocument.wordprocessingml.document",
    compression: "DEFLATE"
})

saveAs(generatedDoc, `${resume.name.first}'s resume.docx`);
Your src/index.js file should now look like this
// in src/index.js
import './index.css';

import Docxtemplater from 'docxtemplater';
import PizZip from 'pizzip';
import { saveAs } from 'file-saver';

import template from './simple.docx';

let resume = {
    name: {
        first: 'John',
        last: 'Doe'
    },
    personalSummary: "Hi i'm John, a software engineer passionate about building well...software",
    jobTitle: 'Software Engineer',
    contact: {
        address: "Lagos, Nigeria",
        phone: '08123456789',
        email: 'johndoe@gmail.com'
    },
    meta_details: {
        dateOfBirth: '24th June, 1995',
        stateOfOrigin: 'Enugu',
        lga: 'Oji-River',
        gender: 'Male',
        maritalStatus: 'Single',
        religion: 'Christian'
    },
    workExperience: [
        {
            nameOfOrg: 'Acme Inc.',
            position: 'Software Developer',
            from: 'July, 2022',
            to: 'Present'
        }
    ],
    education: [
        {
            name: 'Creation Academy',
            location: 'Earth',
            type: 'Primary',
            qualificationObtained: 'Elementary School Certificate',
            started: '18th Feb, 2017',
            finished: '6th July, 2022'
        }
    ],
    referees: [
        {
            name: "Big man",
            nameOfOrg: 'Big man Inc',
            position: 'Big man position',
            contact: 'bigman@verybig.com'
        }
    ]

}

let trigger = document.querySelector('button');

trigger.addEventListener('click', (e) => {
    e.preventDefault();

    return generateDocument(resume, template);
});

async function generateDocument(resume, templatePath) {
    // load the document template into docxtemplater
    try {
        let response = await fetch(templatePath);
        let data = await response.arrayBuffer();

        let zip = PizZip(data);

        let templateDoc = new Docxtemplater(zip, {
            paragraphLoop: true,
            linebreaks: true
        })

        templateDoc.render(resume);

        let generatedDoc = templateDoc.getZip().generate({
            type: "blob",
            mimeType: "application/vnd.openxmlformats-officedocument.wordprocessingml.document",
            compression: "DEFLATE"
        })

        saveAs(generatedDoc, `${resume.name.first}'s resume.docx`);
    } catch (error) {
        console.log('Error: ' + error);
    }
}
PermalinkLet's test the application
Now hit the "Generate Resume" button in the browser and you should see a save as dialog box prompting you to save the document.
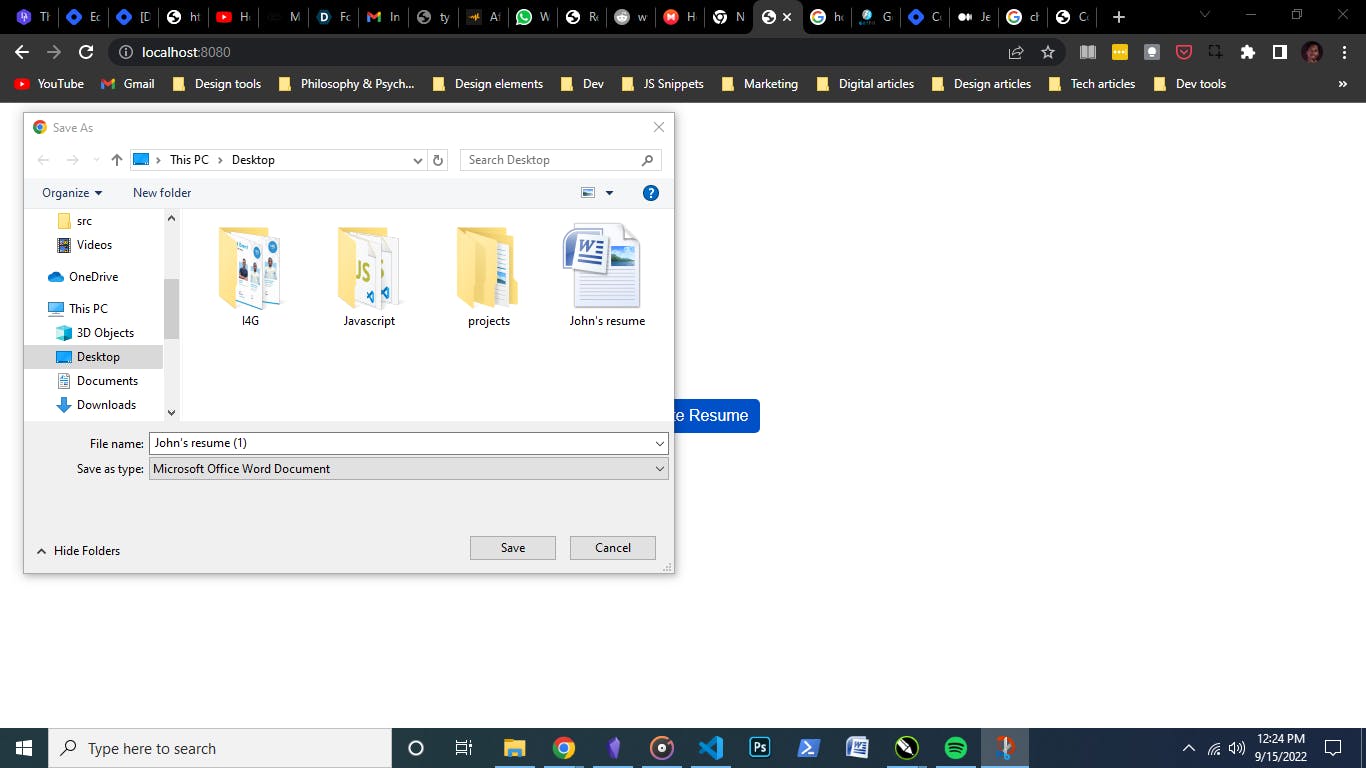 If you have any issues, reference what we did above or comment below
PermalinkWrapping up
And that's it, you've learnt how to generate word documents in the browser. You can integrate docxtemplater into your projects to generate stuff like invoices, office memos and more.
You can even take it up a notch and build a usable resume generator saas like i did or some other document generator (an invoicing application for instance). Really it's up to you
Thanks for reading.
Jeffrey
PermalinkOne more thing...
You might be wondering why i didn't convert our document into a pdf and the honest answer is i tried but i kept having issues setting that up.
So if you have any experience generating PDFs on the browser i would love to pick your brain so i can polish up the actual project that inspired this article.
You can leave a comment below and i'll reach out. Thanks
